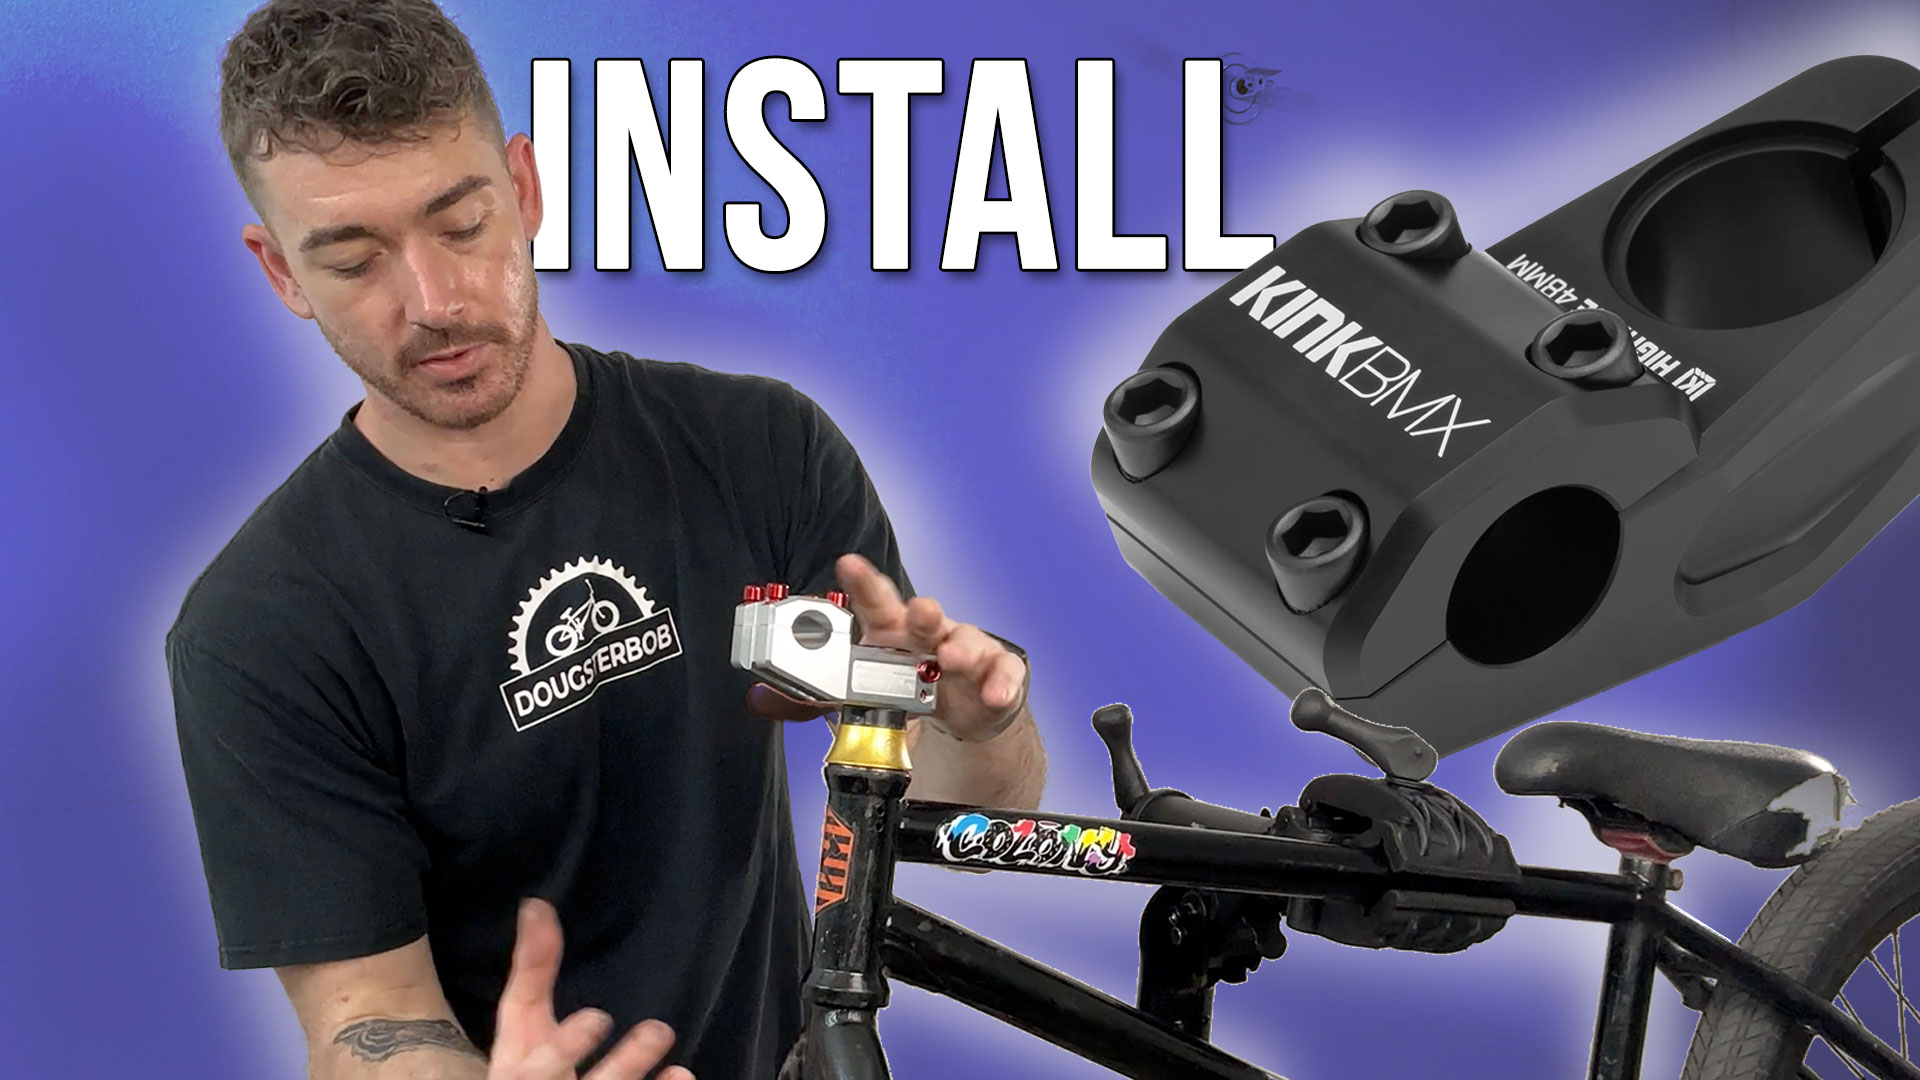
Installing a BMX stem might seem like a straightforward task, but it’s one that holds immense importance for both the safety and performance of your ride. A stem that’s not installed correctly can lead to bars slipping, which not only affects your control over the bike but can also be dangerous. As a BMX enthusiast, you’ll want to ensure that every component of your bike is set up for optimal performance and durability.
In this guide, we’ll walk through the essential steps to install a BMX stem the right way. From the initial setup to the final adjustments, each phase is crucial to prevent common issues that riders face. Whether you’re setting up a new bike or upgrading your current one, understanding how to properly install a stem is a skill that will pay dividends in your BMX journey.
Let’s gear up to dive into the details of BMX stem installation, where precision meets passion. By following this guide, you’ll not only equip yourself with the technical know-how but also with the confidence to perform this task with the finesse of a seasoned pro.
Introduction
Preparing for Stem Installation
Preparing for Stem Installation
Embarking on the journey of installing a BMX stem is a pivotal step towards ensuring a safe and enjoyable ride. The heart of this process begins with the right tools, primarily a 6 mm Allen key, which will be your trusty sidekick throughout this endeavor. It’s crucial to approach this task with the understanding that the sequence of steps can vary based on personal preference. You can either start by removing the handlebars or the stem itself.
For beginners, it’s often recommended to remove the handlebars first, simplifying access to the stem. This approach allows for a clearer view and easier maneuverability when handling the stem. However, the key is to loosen the bolts with care. Bolts can be stubborn, and applying too much force or the wrong technique can lead to stripped threads or damaged parts. A pro tip here is to break each bolt loose before fully unscrewing any of them, ensuring an even release of tension and preventing any warping or misalignment.
For beginners, it’s often recommended to remove the handlebars first, simplifying access to the stem.
Remember, the goal is not just to get the job done but to do it in such a way that avoids future problems like bars slipping or misaligned components. A methodical loosening of the bolts, paying close attention to the pressure applied, is more than just a step—it’s a safeguard against the common pitfalls that can plague BMX riders post-installation. Patience and precision are your allies here, ensuring that the foundation for your BMX stem installation is as solid as the ride itself.
Stem Removal
Removing the Old Stem
Removing the Old Stem
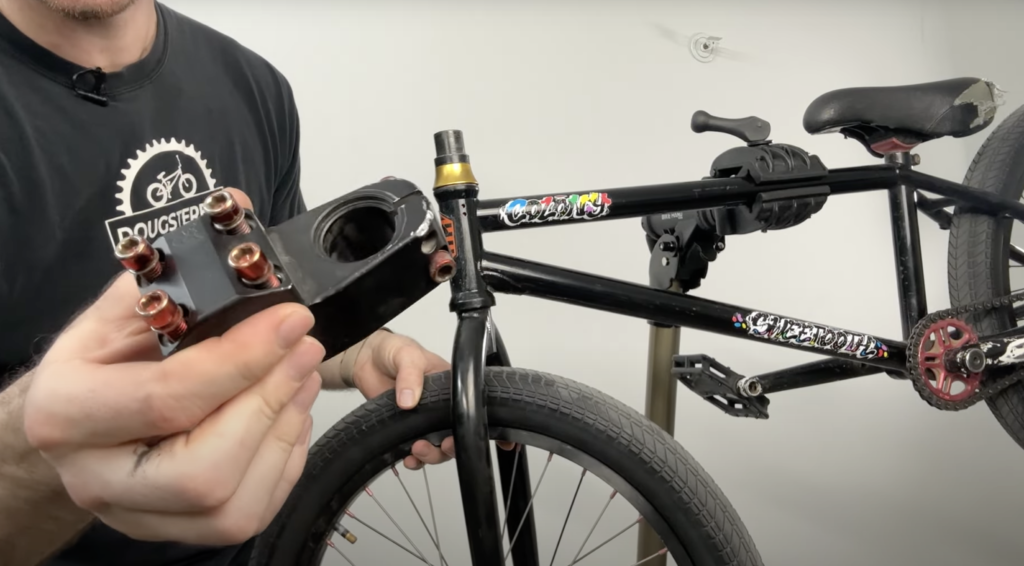
When it comes to removing an old BMX stem, the process is just as crucial as the installation. The first step is to loosen the pinch bolts and the top cap. These bolts are what hold the stem in place on the fork’s steerer tube. It’s important to do this gently to avoid stripping the bolts or damaging the threads. A pro tip for those who encounter a stem that’s stubbornly clinging on is to use leverage. You can take a simple tool like a pipe or a wrench, slide it over your Allen key to extend its length, and gently apply pressure. This added leverage can make a significant difference, allowing the bolt to turn with less force and preventing potential damage to your tools or bike.
Once the bolts are loose, you can safely remove the stem. It’s essential to handle this step with care to avoid any impact on the forks or handlebars. If the stem doesn’t slide off easily, a bit of wiggling back and forth can help. This is where patience and gentle maneuvering come into play. If you find the stem has seized onto the forks, likely due to a lack of grease during the initial installation, you’ll need to wiggle it more vigorously. However, always ensure you’re not applying too much force that could bend or damage the forks.
Removing the stem also exposes the often overlooked dirt and grime that can accumulate in these areas. It’s a good opportunity to clean the steerer tube and the inside of the stem, which can prevent issues when installing the new stem. Remember, a clean bike is not just about aesthetics; it’s about longevity and performance. Once the old stem is off, it’s a good practice to place the bolts back into the stem slightly, so they don’t get lost and you’re ready for the next steps in the installation process.
Stem Installation
Installing the New Stem
Installing the New Stem
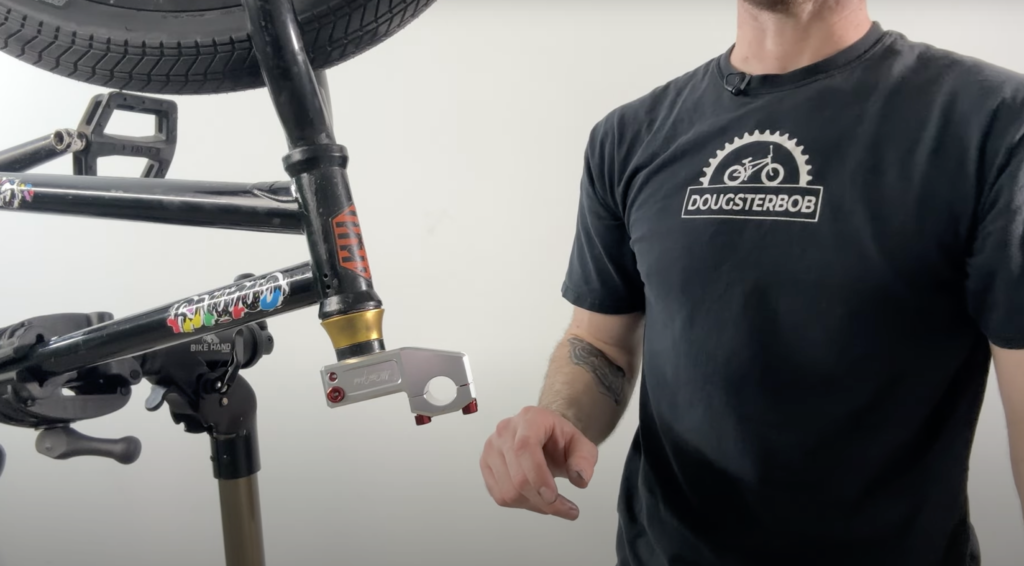
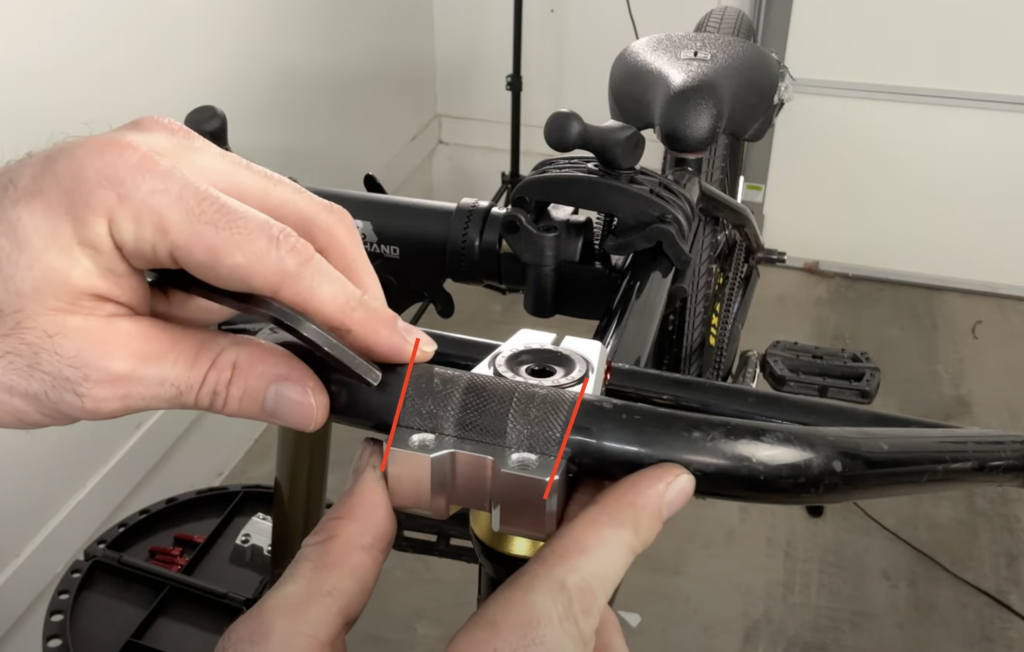
When it comes to installing a new BMX stem, precision is key. The process begins with sliding the new stem onto the forks, ensuring a smooth fit without forcing it. Once in place, the compression cap—a critical component that secures the stem to the forks—must be threaded on. It’s essential to start this by hand to avoid cross-threading, which can lead to significant issues down the line.
One of the most crucial aspects of stem installation is applying the correct torque to the bolts. Over-tightening can strip the delicate threads, especially on hollow bolts, while under-tightening can result in a loose stem that affects handling and safety. It’s a delicate balance that requires a confident, yet cautious approach. As you tighten the bolts, ensure that the stem is properly aligned; an off-center stem can lead to uneven wear and a compromised riding experience.
Before fully tightening the stem, it’s imperative to check the alignment. The stem should be centered over the forks, and the handlebars should be perpendicular to the wheel. This alignment is not just about aesthetics—it’s about ensuring your bike responds predictably while you’re performing tricks or cruising around. Once you’re satisfied with the positioning, you can gradually increase the torque on the bolts, checking frequently to maintain the stem’s alignment. Remember, the goal is a secure fit that maintains the integrity of all parts involved.
Attaching Handlebars
Attaching and Aligning the Handlebars
Attaching and Aligning the Handlebars
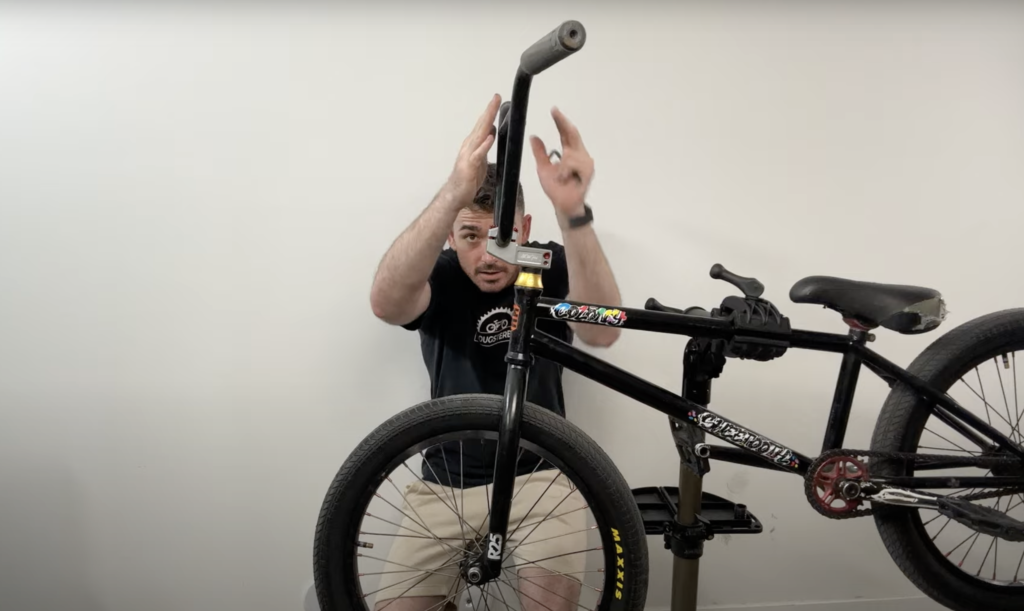
Attaching your handlebars to your BMX bike is a critical step that requires attention to detail to ensure safety and optimal performance. The process begins with a thorough cleaning of the handlebars, especially if you’re transferring them from an old stem. Remove any dirt, grease, or metal shavings that could cause slippage once installed in the new stem. This step is crucial; any debris left on the bars can compromise the grip of the stem, leading to potential accidents.
Once your handlebars are clean, carefully position them in the new stem. It’s essential to align them evenly with the stem and forks. This alignment is not just about aesthetics; it’s about ensuring that your ride is balanced and that your steering is precise. Use the knurling on the handlebars as a guide to align them properly within the stem. If the knurling extends beyond the stem, make sure it does so evenly on both sides to maintain symmetry.
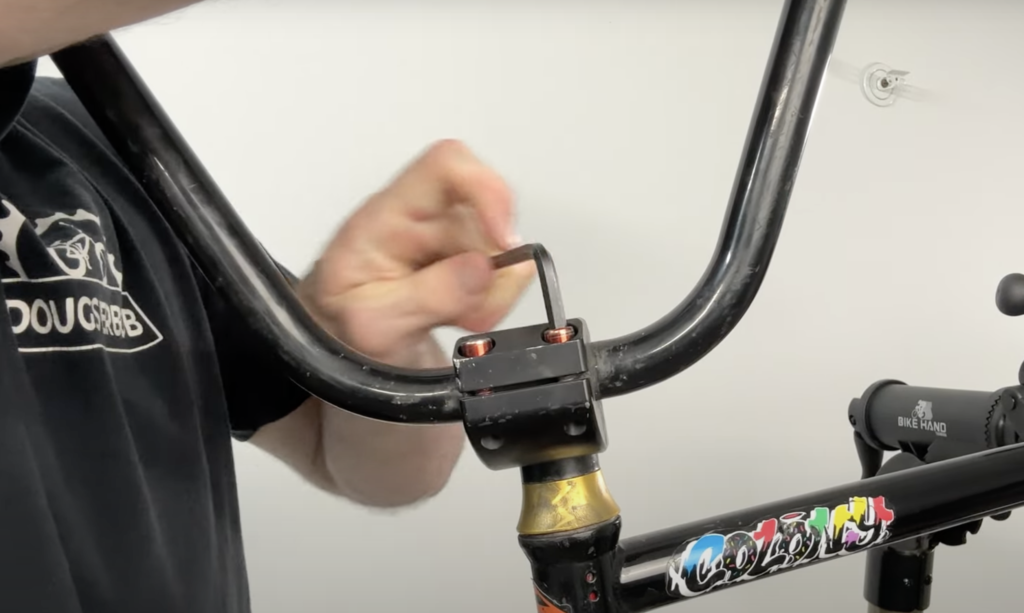
When it comes to tightening the stem bolts, there’s a specific sequence to follow to ensure even pressure distribution. Start by inserting the stem bolts and tightening them by hand to keep the bars in place. Then, snug them down in a cross pattern, which helps distribute the pressure evenly across the bars. Be cautious not to over-tighten at this stage; you’ll need to leave some wiggle room for final adjustments.
Aligning your handlebars with the forks is the next critical step. Look down the length of the forks and adjust the handlebars so that they follow the same line. This might require you to move the bars slightly forward or backward to find the perfect angle. Once you’re satisfied with the alignment, finalize the tightness of the stem bolts, ensuring that the pressure is even but firm. Remember, the goal is to secure the handlebars without compromising their structural integrity by over-tightening.
Finally, it’s worth noting that the feel of your ride can be significantly affected by handlebar alignment. Take the time to make minor adjustments while riding to find your personal sweet spot. This level of customization ensures that your BMX bike feels like an extension of your body, offering the most comfortable and controlled ride possible.
Aligning and Tightening
Ensuring Proper Alignment and Tightness
Ensuring Proper Alignment and Tightness
| Step | Details | Tips |
|---|---|---|
| Aligning Handlebars | Align the handlebars with the forks to ensure optimal control and comfort. | Use the forks as a visual guide to line up the handlebars correctly. |
| Adjusting Pinch Bolts | Adjust and tighten the pinch bolts to secure the stem to the forks. | Ensure even pressure by tightening in a cross pattern. |
| Checking Mobility | Ensure the handlebars can move freely without wobble or play. | If the handlebars don’t spin well, slightly loosen the compression cap. |
| Final Tightness Check | Confirm that all bolts are tightened to the manufacturer’s specifications. | Use a torque wrench if available to avoid over-tightening. |
Once you’ve got your new stem in place, proper alignment is crucial for optimal control and comfort. This is where your BMX riding experience truly gets fine-tuned. To align the handlebars with the forks, you’ll want to ensure that when you look down the length of the fork, the handlebars follow the same line. This isn’t just about aesthetics; it’s about making sure your bike responds predictably when you’re pulling off tricks or cruising around.
After alignment, the next step is to adjust and tighten the pinch bolts. These bolts are critical as they secure the stem to the fork and prevent any movement during rides. But be cautious, as overtightening can lead to stripped bolts or even damage to the stem and fork. The goal is to find that sweet spot where the handlebars have enough mobility for smooth spins without any wobble or play in the setup.
It’s a delicate balance between tightness and mobility. If your handlebars don’t spin freely, you might have overdone it on the compression cap. Conversely, any play in the handlebars could indicate that the pinch bolts need more tightening. Always double-check by giving your bars a spin and ensuring there’s no movement between the stem and fork. This is the kind of attention to detail that separates a well-set-up BMX from a problematic one.
Tightening Bolts
How Tight Should My BMX Stem Bolts Be?
How Tight Should My BMX Stem Bolts Be?
One of the most common questions I get asked is about the correct tightness for BMX stem bolts. It’s a fine line between too loose and over-tightening, which can lead to stripped threads or even a snapped bolt. The key is to apply just enough torque to secure the stem firmly without overdoing it.
To avoid the risks of over-tightening, use a torque wrench if possible. The recommended torque setting for BMX stem bolts is typically around 5-6 Newton meters. However, this can vary depending on the manufacturer’s specifications, so always check the guidelines for your particular stem. If you don’t have a torque wrench, tighten the bolts until they are firm and then give them a quarter turn more. This should ensure they are snug without being overtight.
Here’s a pro tip: when tightening stem bolts, do it in a cross pattern. This means if you tighten one bolt, move to the opposite bolt next. This ensures even pressure distribution and prevents warping or misalignment. Remember, the goal is to have a stem that’s secure enough to handle the rigors of BMX riding but not so tight that you compromise the hardware.
Lastly, always give your stem a quick check before you ride. Make sure there’s no movement and that all bolts are still tight. This habit can prevent accidents and ensure your BMX bike is always ready for action. Regular maintenance and checks are the key to a safe and enjoyable riding experience.
Conclusion
Mastering BMX Stem Installation
Mastering BMX Stem Installation
Installing a BMX stem might seem daunting at first, but with the right tools and a bit of patience, it’s a task that can greatly enhance your riding experience. We’ve walked through the key steps to ensure that your stem is installed correctly, from removing the old stem to aligning and securing the new one. Remember, the stem is the pivotal point of your bike’s control system; a proper installation is crucial for both safety and optimal performance.
Throughout this guide, we’ve emphasized the importance of correct torque application and the dangers of over-tightening. It’s a delicate balance to strike, but one that’s essential to maintain the integrity of your BMX bike. Ensuring that your handlebars are perfectly aligned with your forks will not only improve the handling of your bike but also prevent unnecessary wear and tear.
As you master the process of stem installation, you’ll develop a deeper understanding of your BMX bike’s mechanics and gain the confidence to make adjustments that suit your riding style. Always double-check your work for safety and peace of mind. And remember, if you’re ever unsure, it’s worth consulting with a fellow BMX enthusiast or a professional.
To all the aspiring BMX riders out there, take this knowledge and apply it to your ride. And if you’re looking for a visual aid to accompany this guide, don’t hesitate to check out our YouTube tutorial for a step-by-step visual walkthrough. Happy riding and keep shredding!


